(The Hammer)
The official Transmission of the Klingon Imperial Weapons Guild.
9812.15____________________________________________Vol.2/No.7
Greetings !
I welcome all of you who appreciate the seductive curves and radiant warmth of steel fashioned into the perfect Klingon blade - the betleH vaQqu' !! Whether you are fortunate enough to create your own custom weapons, aspire to learn the art or just want to associate with blade-smiths, *The Guild* is here to serve you and the Empire.
K'Daq son of Toragh
![]()
In keeping with the holiday spirit, I won't bore you with an editorial this month. We have a lot of good material for you to check out and I'll let it do all the talking.
Keep your forge hot !
K'Daq
![]()
Heat Treating Steel: Conclusion
In the past two issues we've tried to get you up to speed on some of the terminology and characteristics of steel, especially where you might be using it in knife/sword making. Overall we've actually been discussing heat treatment of steel, so in this conclusion I'm going to try to summarize it all into a tight package.
For starters it is important to note that not all steel can be hardened. You might have been aware of the inability of other metals to be hardened to the point of holding a good edge, but the number of people who are not aware of the vast differences in the many varieties of steel is a fairly large number. So.....all steels canNOT be hardened. Be careful while digging around scrap yards. If the owner syas "I'm sure its heat treatable" he's not lying.....you can heat treat it......you just might not be able to harden it. A very simple tool to take with you is a small magnet. The rule of thumb is that if the magnet attracts the steel, then it probably has the proper alloy content to allow for hardening.
There are basically three steps in heat treating a blade :
1. Hardening - In this step you heat the steel to a certain range of temperature (depending on the alloy you are using - check with available metalurgic tables) for a certain period of time and then quench it rapidly in a bath of oil, brine or water. There are several critical aspects of hardening. A).You need to heat the steel evenly as you bring it to temperature or it will warp. B). You need to keep the length of time at the proper temperature as short as possible or the steel will start to decompose, or decarburize (both of these lead to a serious weakening of the steel ). The longer you keep the steel at high temperature the more breakdown occurs. C) Discoloration of the steel ( impurities in the atmosphere in which the blade is heated can effect the outward appearance of the steel - ideal solution is to heat in a vacuum) D). Ultimate hardness is determined by the type of quenching bath and it's properties (how fast it cools the steel and how many impurities are in it).
Hardening brings the entire piece of steel up to a desired maximum range of hardness.
2. Tempering - In this step you again heat the steel (but to lower temperatures). This step softens the steel slightly and removes the brittleness that accompanies the hardening step. The ideal goal of this step is to produce maximum or optimum *toughness*. The level you temper to is going to depend on the ultimate use of the blade. Again, refer to temperature charts to determine what level you need to heat your blade...although in this step a great deal of attention is paid to the color of the steel when heated. You will hear most smiths talk of the color needed to temper the blade and not the temperature (you won't find too many *candy thermometers* stuck in the forge). Steel goes through a basic range of colors just as the titanium projects I have written about -
gold - bronze - redish bronze - purple - light blue - dark blue. The steel becomes soft starting around late purple stage and maxes in softness in the blue ranges. Maximum hardness (with removal of brittle apsects)can be acheived if you heat to the redish bronze to bronze.
3. Annealing - This stage softens the steel in certain areas of the knife in order to create a situation of maximum strength. If you can produce a hard, semi-flexible edge backed by a soft malleable spine, you'll have a combination that is hard to beat......but it takes practice and patience. In annealing the metal is again heated to a certain level ( a deep blue). Specifically we are talking about the spine or backbone of the knife......that part of the knife that is farthest away from the cutting edge and then the handle area or tang. While performing this step it is important to not let the coloration spread onto the cutting edge. Keep a bucket of water handy to quench the edge in case the blue starts to encroach on it. Try to quecnh only the edge, since if you quench the entire blade you'll have to start over again. Annealing takes place when the steel cools slowly. Rapid cooling creates hardness. When you achieve the proper color in the poper area of the blade you allow it to cool slowly and then repeat the procedure by applying heat to the tang (again protecting against the coloration in the edge area).
These series of articles have been on a very basic level in order to give you all a rough idea of the science aspect of this *art*. As in any creative process the skills required take time and practice to develope, but hard work, perseverance and a love for the craft will always prevail.
![]()
Matched Pair : Short Sword and Dagger
I was going to finish the hammer project this month till I had one of the guys I work with ask me to make a sword for his girl friend . I already had the blade and handle made , but no guard . He told me that she likes ankh's so I used that as a base for my creativity . I also showed him a dagger blade that I had made , and he wanted a matching set of a short sword and dagger ! I still think he is brave for a Terran , giving his mate a sword and dagger set , but since he was paying , I put everything else on a back burner .
The sword and dagger are the same except for a few dimensional changes so I decided to stick to the dagger here since I had more to do on it. Both blades are carbon steel , differential tempered (by yours truly ) and mirror polished .
I used stainless steel for the guards , brass for the spacers and pins , and walnut handles ( mostly cause that's what I had in the shop ) .
I prefer a modified Japanese tang . What that means is that the tang is thinner and not as wide as the main blade , and is completely hidden in the handle . I find it a lot easier to fit guards this way , cause the tang doesn't grow to full thickness till just before the guard , it also gives a strong blade-to-tang ratio and a great deal of weight control for balancing the knife . On a tempering note , I temper the tang down to almost dead soft so that I can do whatever drilling and cutting much easier . Onward to the guard !
I made the guards in a two piece fashion that I picked up from K'Daq . I haven't seen anyone else do this , so I might be starting something here , but off we go ...
You'll notice I have one surface labeled "A" it must be flat . A disk sander is most helpful in that regard . I start with cutting the guard oversized , when you fit the two pieces together it gives you some leeway to finish the outer edges . Surface "B" is filed to fit the blade tang , doing this way I have room to get the wheel from my bench grinder in there to rough it out , and my files to semifinish it . After that some 120 emery cloth to finish it up . If you do happen to get carried away and remove too much , you can take some from surface "A" till you get a very good fit to the blade . Then you clamp the two sides together , drill the holes , set your pins and finish the profile . If you use the same metal for the pins as you did for the guard , you'll barely even see 'em. .
The spacer on the top of the handle is made from 3/16 brass on the dagger and 1/4 brass on the sword ,those are drilled and filed to fit as well . Next are two spacers that are made from a stabilized paper , I got them from Texas Knife Makers Supply - the first one is black , then a thinner white one . They add a real professional look and are very easy to work with , I just glued them together and then to the brass and trim them with an x-acto knife . Next comes the wood .
The dagger handle is 5" the sword , 6" . I started by cutting them to length , then I split them down the middle length-wise with my Dad's band saw . Then hand sand them lightly to remove most of the band saw marks , don't get carried away or you'll change the profile and won't get a good fit when you glue 'em back together . If you do , then you have to make both sides perfectly flat , but then the grain in the wood won't match as well . O.K. after you get them cut and sanded lay the tang of the blade where it will eventually go , and draw a line all the way around . Now you need to remove the wood inside the lines . You can mill it out , you can use a Dremel tool or even a chisel will work , just try not to get in too deep or you'll get a weak joint . After you get the channels in both sides of the handle , glue then back together . Now epoxy the brass and spacer group on the top and let it dry . Once everything is set profile the handle . I hand sand it down give it a couple a layers of tung oil , then buff the whole thing down to a nice polish .
Once I had everything fit together , if you don't keep everything square this takes a while . Sometimes you can file this piece or that piece to get good tight fits , sometimes things will only go together one way and no other . Slide everything together and make sure you know how it fits BEFORE you mix the epoxy !
Once everything was set up then I set the whole thing , squared and leveled , in the drill press and drilled through the handle and tang ( this is why I leave the tangs soft ) . Set the pins , epoxy them in place , file them off , sand 'em down a bit and polish the handles again . Now sit back and enjoy the finished product !
Dual Teaching Project: Carbon Steel (D2) tajtIq and stainless steel (440C) thrower.
tajtIq
Length : Pommel to point - 24 inches
Width : (at it's widest point) - 4 inches
Material : 3/16 th inch D2 carbon steel
Handle : Walnut Dymondwood with Brass guard (full tang)
Weight : 2 pounds
Aspects to consider in construction:
1. If using a full tang design, shape the tang so that it comfortably fits your hand. Allow for the handle material and create a narrow oval cross-section. Extend the material almost to the pommel area and use the bevels at the rear of the handle to guide your handle grinds smoothly into the handle material.
2. If using a hidden tang, fit a solid , sturdy guard and a similarly sturdy pommel before placing your handle material. Polish the guard on the face that points towards the blade before attaching it to the blade so that you reduce the chance of banging up your finished blade.
Klingon Throwing knife
Length : 10.5 inches
Width : 2 inches
Material : 1/4 inch 440C stainless steel
Handle : Walnut Dymondwood (full tang)
Weight : 1 pound
Aspects to consider in construction:
1. Leave the tang oversized until all the grinding and polishing has been done to the blade. You want to make sure you have metal available when you balance the final knife.
2. The handle material should be a solid, sturdy material and should be set back from the perimeter of the tang itself in order to remove the stress of direct impact from the material. You should end up with a rounded or beveled metal edge leading into the handle itself.
Over the past year we have discussed a number of aspects of knifemaking and we have had one teaching project in which we used a number of these together to create a QIS. One of the objectives of this article is to put to use as many of the varied apsects of knifemaking as possible, so as to allow you to see them in real situations.
OK, lets get started.
First I want to touch on choosing a subject knife. This may sound simplistic, but it is important to remain flexible in this business. Klingon weapons tend to be large and large steel is hard to find. I usually have several knives in mind and let available material determine what I do. If I have a project that has to be done (as I encountered with the Praxis Exhibit), then I will actively search for material - but this is time consuming and usually much more expensive.
Lets assume you have an unlimited source of steel. First you need to decide whether you want to use stainless steel or high carbon steel. The obvious difference in these two is the rust resistence of stainless as apposed to that of carbon steel. Many craftsmen will talk of *grain size* and the ability to keep a consistent edge with one or the other material. There will always be strong opinions about one being superior to the other in a variety of respects, but you (as the craftsperson) will have to formulate your own opinions as you gain experience. There are specific chemical and microscopic differences in the two materials.....in fact there are chemical and microscopic differences within the separate groups. Your style of work - design, beveling, tempering etc. will all determine how you view the material you choose to work with.
Since you have an assumed *endless supply* of steel, you will obviously be using knife grade steel. This brings up an important point (see the conclusion of the *tempering article* above). You need to remember that not all steel can be hardened - this includes stainless steels. If your intent is to create a knife with a good tempered edge, then you need to start with the proper stock. Remember the *magnet* test.
Type of Steel
The dual nature of this project allows us to look at both stainless and carbon steel as blade materials. The tajtIq will be made of D2 tool steel. This steel can achieve very high Rockwell numbers - the levels needed for good quality tools. That means we will have no problem tempering it to the levels needed for a good blade. If D2 has any drawback it is that it tends to be brittle and probably wouldn't be advisable for a throwing knife. The throwing knife will be made of 440C stainless. This is a popular knife grade stainless material that also tempers well.
Size of Stock
The thickness of the metal you choose is going to be based on the demands placed on the knife, ie. combat stresses, weight, durability etc.
The tajtIq needs strength since it is a primary bladed weapon and will go against the larger bat'leths and the occasional Sword of Kahless. It also needs to be as manuverable as possible to help make up for its smaller overall size. For this reason I chose 3/16 th D2. This creates an overall strength without slowing the weapon with excess weight.
For the thrower, one needs a great deal of durability. Throwers almost always undergo the great stresses of hard impact. You might occasionally be forced to use one in close combat as a secondary weapon, but that is outside of its major design requirements. I chose 1/4 th inch thick 440C for the thrower with a full tang design to support a heavy central spine created by the double beveled edges. The full tang also results in a stronger handle. This is a little ahead of schedule, but handles on throwing knives need to be as simple as possible. Repeated impact will crack most (if not all) of the wood and horn materials.
Cutting the Pattern
We'll utilize two methods for cutting these blades out. The tajtIq will be cut out using a method taught to us by K'Beck several months ago. In this technique you transfer your pattern to the steel and drill a series of holes along the outer edge of the pattern lines. Try to keep them as close together as possible.....keep your drill bit cooled and lubed with good cutting oil........follow your pattern. The end result is a *dotted line* around your pattern. The next step is to shear the *walls* between each hole with a *cold chisel* and sledge hammer*. ****Use eye protection on this step as steel chips WILL fly**** I use a half inch chisel and a three pound hammer. The positive aspects of this technique are that it requires *lower tech* equipment (and hence lower costs) and it is easier to cut out larger patterns that might not clear the *throat* of a standard band-saw. The negative aspect of this technique is that it creates a very rough pattern that takes more time to *clean up*.
The thrower is cut out using a standard metal cutting band-saw. This is a convenient sized project for the saw, but it does involve more *effort* to guide 1/4 inch steel through a saw blade. The positive aspect of this technique is that it leaves the edges of the pattern very clean which reduces finishing time. The negative aspects are the cost of the machinery and a higher level of danger involved with using a power saw.
*Cleaning Up* the Pattern
No matter what method you use to cut out your pattern, you are still going to need to clean the steel to your pattern lines. With the blades cut with a bandsaw the *clean-up* is pretty simple and can be done with hand files or sanding belts, but those cut out with the drill and chisel method require a bit more labor. The following pictures show three different surface progressions.
Top - *serrated* edge after cutting with drill and chisel.
Center - edge cleaned with 60 grit abrasive stone wheel on bench grinder.
Bottom - edge cleaned with 80 and then 120 grit abrasive belts on a bench mounted grinder.

I like to start with my bench grinder and a 60 grit stone wheel. This set up allows you to easily remove the *serrated* remains of the drill holes for a minimum cost and a minimum effort. It does leave the edge rough, but if we tried this step with a cloth sanding belt, the *serrations* would very likely shred the belts. Another issue is cost - a 60 grit stone wheel costs around 8 or 9 dollars and lasts quite a while and belts cost around 4-5 dollars each and you'd easily use or shred 4 or 5 in cleaning the perimeter. Once you have the serrations removed, you can then move to belts and /or files to finish to the pattern line.
The next two photos show the assortment of grinding/polishing tools used and the different finishes created by each.
With the pattern perimeter filed to it's border, the next thing I like to do is to polish both flat sides of the entire knife - from tip to tang. Even though the material under the handle will not be seen, this prevents ledges from being formed by sporadic grinding that might interfere with a good handle fit. It also insures that no rust or loose scale remains under the handle.
Most steel plate leaves the factory with some sort of milled finish, and there might be scale present. If the material is being recycled from *another life*, it might have a reasonably good surface on it already. Both the D2 and the 440C in these projects were fresh from the mill. There is noticeably more scale on the D2 along with an oxide layer while the 440C has only a slightly pebbled matte finish.
I started with an 80 grit belt on my table mounted belt sander. It is very important to work your grinding belts in the same direction on the piece so as to line up all the grind marks. For this stage I prefer grinding from *tip to tail*. This prevents the formation of *dips* and *ledges*between each grind area since you can cover the entire body of the knife with each pass (I have a 4 inch wide belt and the blade's max width is 4 inches <tajtIq>). On larger blades (bat'leths, meqleths and SOKs) you won't be able to cover the entire piece with one pass so it is important that you develope a sound technique for making multiple parallel passes. You can secure your blade to a table or to a piece of plywood laid on the floor and use a hand-held belt sander. This also works on smaller blades - for those of you who don't have table mounted belt sanders.
The hand-held takes longer to achieve the same results since it doesn't have the power and/or torque of the table mounted machine, but with patience you can arrive at the same level of polish.
***Remember......steel works better if you work it slowly. These steps might sound just like woodworking, but the material is radically different. Get to know what you're working with and you'll find your satisfaction level rises. There is nothing more frustrating and more damaging to learning a skill than false expectations.**** Sermon over.
If you can't get a hand held sander, you will need to rely on the great variety of hand tools and sanders (and a lot more patience), but as we have seen with toQDuj's work, it is possible to achieve great results with the simplest of tools.
Simply put, polishing is merely replacing scratches with progressively smaller scratches. When the scratches are finally small enough, the steel will start to reflect or appear shiny......the smaller the scratches, the shinier the steel gets (or any other material <- specifically handle material).
I start with 80 grit abrasives and continue with 120, 220, 320 and finally 400. I stop at 400 and leave the steel with a smooth burnished look. I don't care for mirror finishes on my Klingon blades. If you do, you'll need to move into the realm of polishing compounds and motorized buffing wheels (thats not going to happen here).
If your steel has an existing finish you'll want to adjust which grit you start the process with.
***Note - I could tell a difference between the D2 and the 440C in these polishing steps. The D2 produces a flurry of yellow sparks and wears the belt out much faster than the 440C - it took a considerably longer time to achieve the same reults with the D2. It wasn't as if the D2 was a harder material - it was more like it had abrasive qualities of its own working against the belts.****
Placing Bevels
Now that you've got a nice flat smooth finish to work with, placing bevels is easy. You've had lots of *warm-up* grinding the *flats* and you are ready!
This process is very similar to that used in preparing the body of the blade. First you roughly shape the bevel, then refine it and finally you polish it.
The first step is to identify and mark the centerline of your material........ie. if you have 1/4 inch material you need to place a line at 1/8 th inch along the entire length of the material that the bevel will occupy (but ya might as well mark the entire piece of steel just in case you have a change in your design <G>) (* Artists NEVER make mistakes........we just change our designs)}};-)
There are many ways to mark the centerline. *Texas Knifemaker's * sells a scribing tool that works great, but you can make your own tool quite easily. My first scriber was a nail in a block of wood that I sanded down until the tip stood 1/8 th of an inch above the surface that the block rested on. Then all I had to do was lay the steel on a flat surface and slide the block around it - scratching all the way. The advantage of a commercial scribe is that they rest on the steel itself and no flaws in the tabletop will affect your mark. There are also occasions where the steel itself will have a slight *bow* in it and that will make it impossible to lay flat and hence your mark will be in error. Just be sure to double check the placement before you start removing steel.
In order to make the line stand out, you'll need to coat the edge of the steel with a contrast color - I use metal *bluing liquid* or a simple marks-o-lot. A line scratched into one of these colors will stand out easily while you are grinding.
Before you make your preliminary bevel grinds remember that in the course of progressing from one grit to the next you will also be removing more steel.......so.....DON'T MAKE THE ROUGH GRINDS TOO CLOSE TO THE CENTERLINE !! If its your first attempt at grinding a bevel, be cautious and do one or two preliminary runs through 80/120/220 grit to see how much steel gets removed with each step and how close to the center it takes you. You can be more aggressive as you gain confidence.
One more point. You will not be grinding all the way to the centerline. This bevel is the primary bevel but it is not the cutting bevel - that will be placed after the steel is hardened and tempered. I grind my primary bevels so that about a 1/32 th inch overall edge is obtained.......so you'll be coming to within 1/64 th of an inch on each side of the etched line.........duh! After tempering you will do a final grind and polish on this bevel which will take it even closer to the centerline.
So how do you grind a bevel ? Grinding a bevel is done by holding the metal at an angle to the grinding tool (or vise-versa in the case of hand tools) and sliding it smoothly, and without hesitation, across the entire length of the needed bevel. The angle you hold the steel at depends on how wide you want the bevel, the type of bevel you are placing, or how heavy you need the edge to be. I'm going to describe this process first using the table mounted bench grinder as the example since thats what I use.
I am placing a flat bevel on both of these knives but there are several bevel choices. We will touch on the different bevels shortly. My grinder has an attachement called a *platen* - its a flat section that the belt runs across which allows you to grind surfaces flat instead of curved like the surface of the wheel. In my set up. I will have a work rest on which I will brace the steel and then I will pivot it into the belt supported by the platen to get a flat grind. The wheel will be turning the belt *down* into your work, so place the cutting edge up and the point to the right. I grind from the left to the right (handle to the point) and it is important to start at the same position on the steel with each pass. Because of leverage (where you're holding the blade) you'll tend to put more pressure on the blade near the handle end and slack off toward the point. If you don't correct for this, you'll end up with a very lopsided bevel. Pay special attention to creating a level of pressure and maintaining that specific level along the entire grind. The point is usually the hardest section since you have little to hold onto and due to the fact that you will be shifitng your fingers to avoid grinding them with your blade. Also near the end of the beveling process the point will be thin and prone to overheating. This can lead to a *burned* blade that might not be salvageable.
Continue making passes until your bevel reaches the boundaries you have designed and it is smooth and even - then repeat the process on the other side of the blade only reverse your grinding directions (right to left now but still handle to point).
Remember these things while grinding:
1. Maintain the same angle with each pass.
2. Keep your pressure even along the entire length of the grind.
3. Don't allow the blade to turn or twist in your hands - keep it in a solid relationship to the grinding surface.
4. If you need to reduce the thickness of the edge, correct the angle by applying more pressure to the edge.
5. If you need to make the bevel *steeper* correct the angle by applying pressure to the center of the blade.
6. Cool the blade periodically to prevent *burning* or overheating the metal.
The grinding on both the tajtIq and the thrower are very similar. Due to the difference in thickness of the steels, you actually arrive at a similar final angle for this bevel. The big difference is that on the thrower, the bevels meet in the center and form a *spine*. This is an attractive aspect on a knife, but it is difficult to do without patience and practice. In most bevels you can have little discrepancies and they won't be obvious, but when you bring bevels up and butt them together in the center of your knife any little wave or ripple in your bevel shows up like a big boil on your nose. <G> To make this sort of arrangement work you need them to meet at a sharp straight line - so take your time.
Types of bevels
There are several types of bevels, but you will probably stick to one of two types in making Klingon knives (you'll see why as you read on).
1. Hollow Ground Bevels. Basically this is a concave edge that is formed by the curve of the grinding wheel surface. This is the best bevel for cutting and slicing since it sharpens to a very fine edge, but it tends to be fragile. Since Klingons make heavy use of their blades and chop through bone, etc. this is not a good choice for the majority of them. However it would be an excellent choice for the QIS, ghonDoq and portions of the qutluch.

2. Cannel Bevel. This is a convex edge that looks like a flame point in cross section. It is best used for heavy chopping weapons like axes and bat'leths. It makes a good edge - not a great edge - but it will hold its edge for a very long time.This is also one of the easiest bevels to place.
3. Flat Bevels. Its just what it says it is......flat. These produce a medium weight blade that sharpens easily and it can stand up to chopping and hold its cutting edge. The good side of the flat bevel is that it can be produced with hand tools but the downside is that it show up *flaws* more easily than any other bevel. This one works for the mid-sized Klingon blades - meqleths, tajtIqs and yans. You could probably use it on a bat'leth but I prefer the cannel on those. Of course the qutluch can make use of this bevel as well - but then it has so many different edges, you can probably use them all on it.
4. Chisel Bevel. This is a flat grind but its one sided. It works great if you don't feel like marking a centerline <G>. Actually the chisel is used on many oriental swords and knives and can be a terrific edge when properly placed. This edge is best used on tools and I can't think of any Klingon blades where I would select a chisel edge.
To be continued:
Next issue. Hardening/tempering, finishing/polishing, handlemaking, and sheath constrcution.
Bonus Blueprint:
Standard bat'leth
Width : Primary tip to primary tip - 40 inches
Depth : Distance from primary tip to base of spine - 15 inches
Material : Quarter inch titanium
Handles: Leather wrapped over hardwood spacers
Weight : 6 pounds
![]()
Master Qolotlh's Sword of Kahless
One of our newest members demonstrates his skill with a glorious version of the Sword of Honor. Take note of the engraving on the left sword - excellent attention to detail.
More of Qolotlh's work in progress. Two meqleHmey and two d'k tahgmey in progress. No comments on the picture.....I only post 'em <G>. I'm sure we'll get to see the ends of those meqs when he is finished.
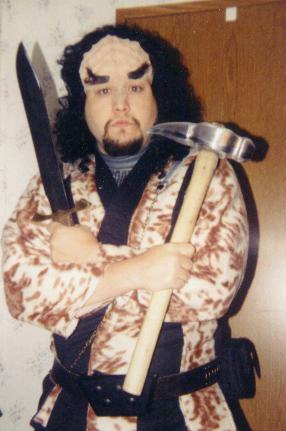
Just when you thought war hammers were dead ! This one will satisfy the *hammer lust* until next month when K'Beck wraps his project up. Take note of the face of this weapon. Talk about spreading the news of the Klingon Empire ! I wonder if a different face is what is responsible for the bumpy head son modern Klingons ?
Excellent job Qolotlh.
Master K'Beck at His Finest
Since I met my honored friend for the first time in person, he has never let me down. You can see why his articles are so motivational. I believe he was on his way to *Denny's* in this picture - you know how hard their meat is to cut <GGGG>
............but seriously klin......two examples of K'Beck's excellent craftsmenship in his original war hammer and tajtIq design.
Questions?
